A TinkerKit Braccio arm has six servos, whose angles require careful calculation and control. Our goal was to make it sort coloured blocks into bins with nobody steering it: find a block, pick it up, work out its colour and put it in the right place. We were a team of four on UCL’s Engineering Foundation Year.
What we built
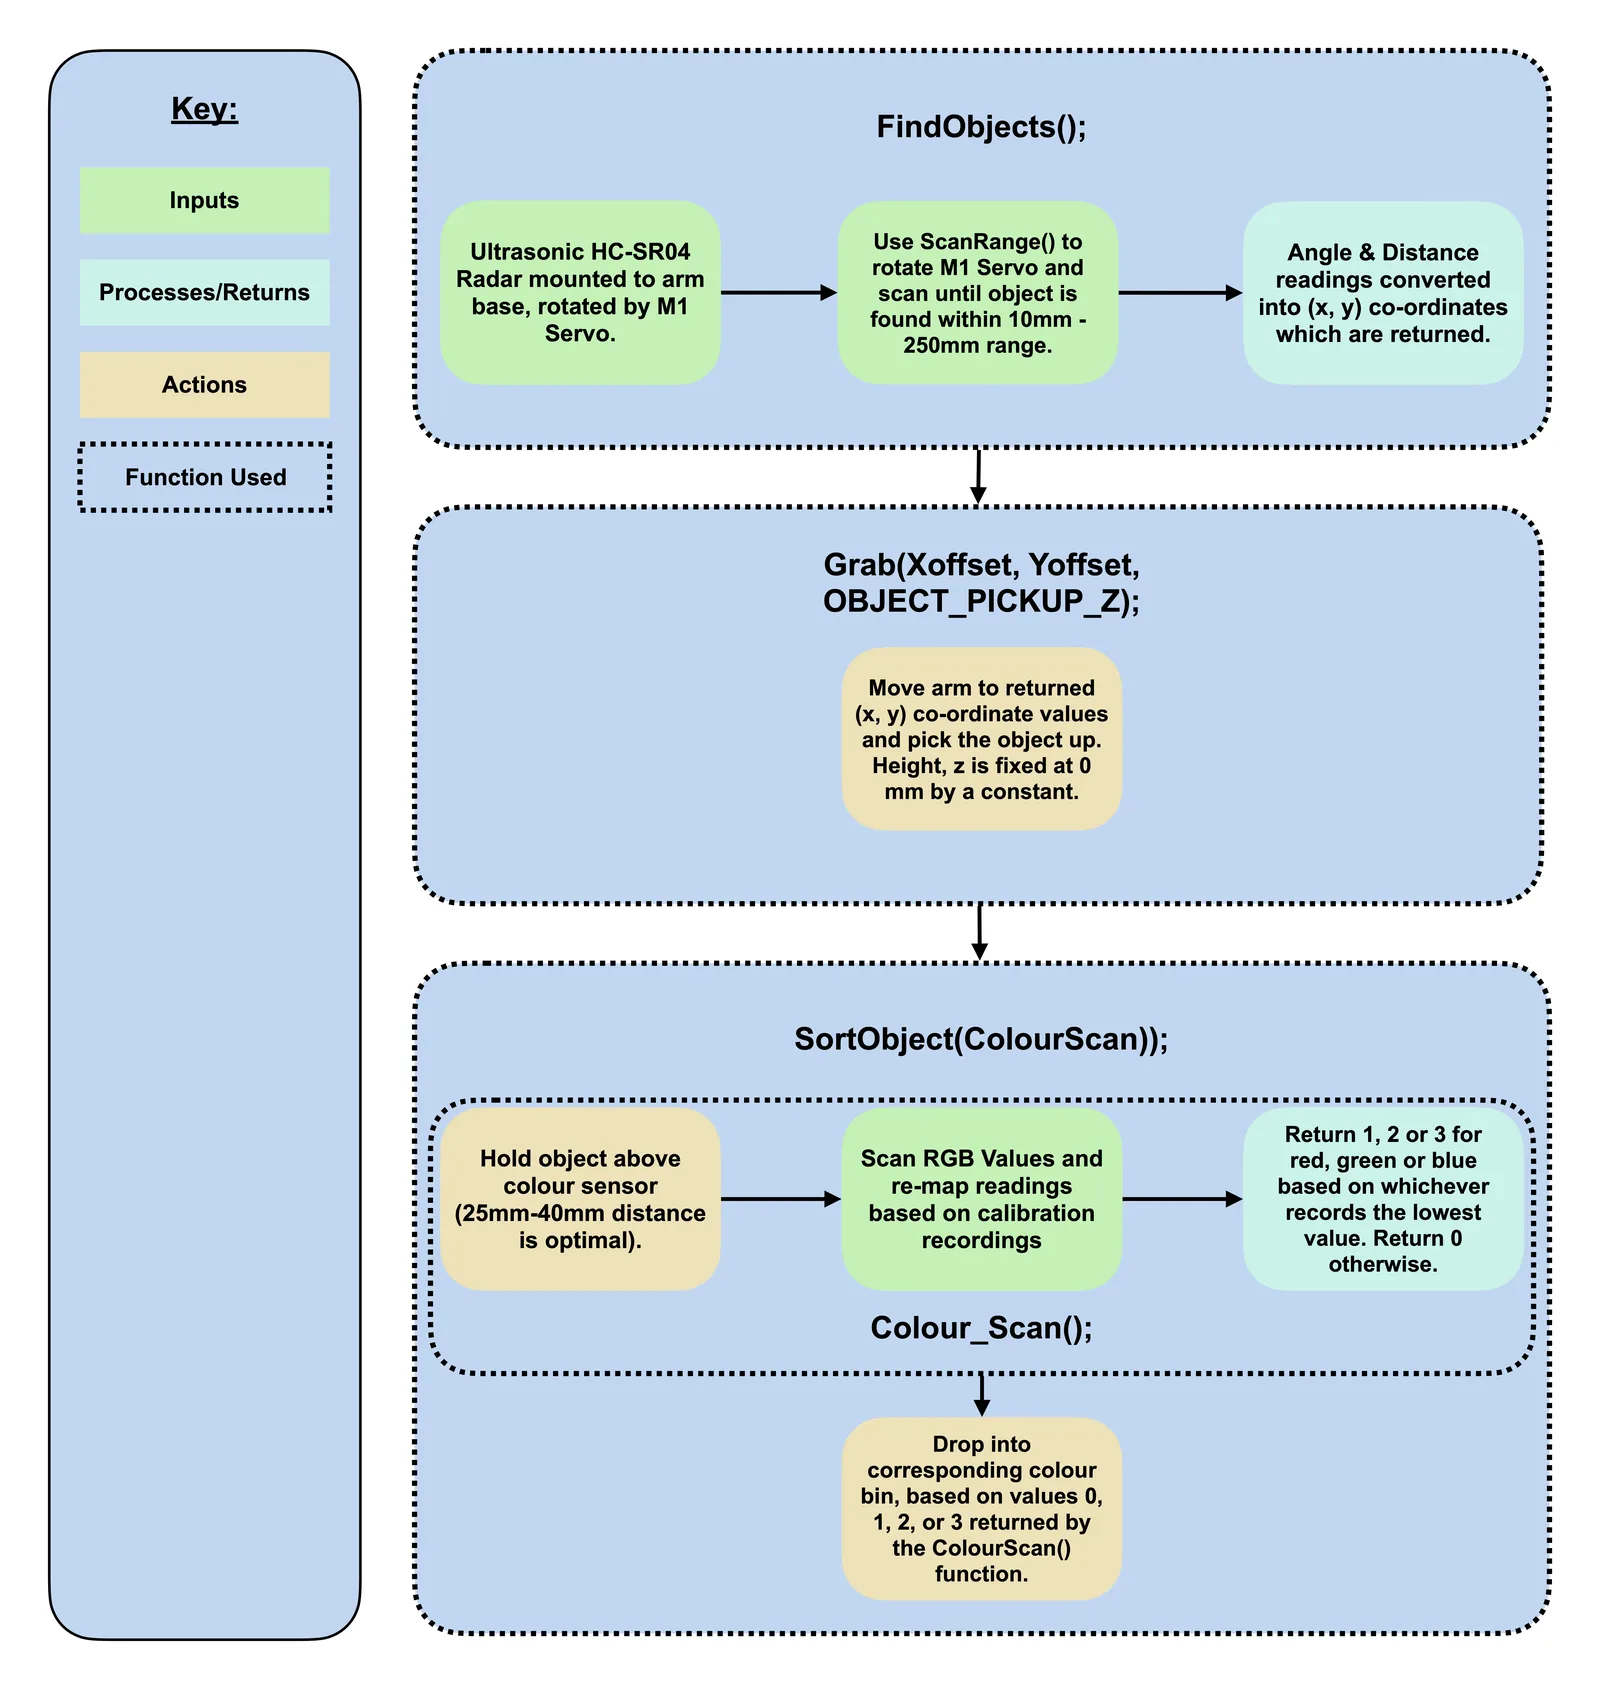
An Arduino drives the arm, and I wrote its code, in C++. An HC-SR04 ultrasonic sensor on the rotating base sweeps round in 2-degree steps, listening for something between 10 and 250 millimetres away. When it hears a block, the sketch turns the angle and distance into x and y coordinates, and an inverse kinematics library turns those into servo angles. The arm picks the block up, holds it 40 millimetres above a TCS3200 colour sensor, reads red, green and blue, and drops the block in the matching bin. Then it resets and starts again. There is no camera. Two sensors do all the sensing.
The hardware
The arm didn’t come with a wooden base, so I designed one. We laser cut it from plywood: it holds the Arduino and the wiring and gives the arm a stable footing. Then we laser cut cardboard pieces that extend it, an expandable, modular layout around the base. We added a rubber grip to the gripper to help it hold the acrylic blocks.


I also designed a custom mount for the ultrasonic sensor, which sits on the arm’s rotating base. It couples with a front face designed by mayaway, which ArthurSh used in his remix.


What it showed
It showed that with some experience and clear constraints, it is possible to build a capable system.
Robotics is difficult, though. When your code is wrong, the consequences are physical, anywhere from stripping a thread to whacking someone with the arm. It taught me that hardware systems need process, procedure and consideration. The arm’s movements, for example, had to be rate-limited to stop it spinning out wildly.
It also made clear just how large the action space is in the real world, and how hard that is to account for. This year I’m taking Robotic Systems as part of my Intelligent Systems minor, which will teach me to handle the real world, and the grey areas in its decisions, more consistently with machine learning.
The arm’s sketch uses the InverseK library (GPL-3.0) and Arduino’s Braccio library (LGPL-2.1); this page neither hosts nor ports either. The sensor mount couples with the front face of HC-SR04 Board Mount by mayaway (Thingiverse, CC BY), as used in ArthurSh’s HC-SR04 Holder (CC BY-NC).